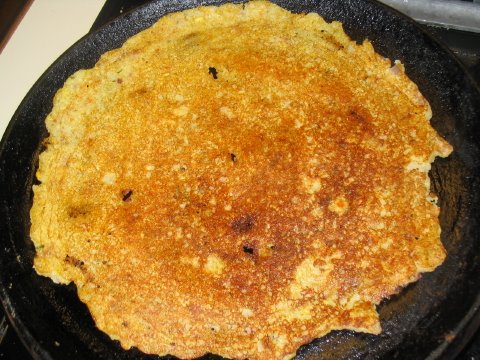
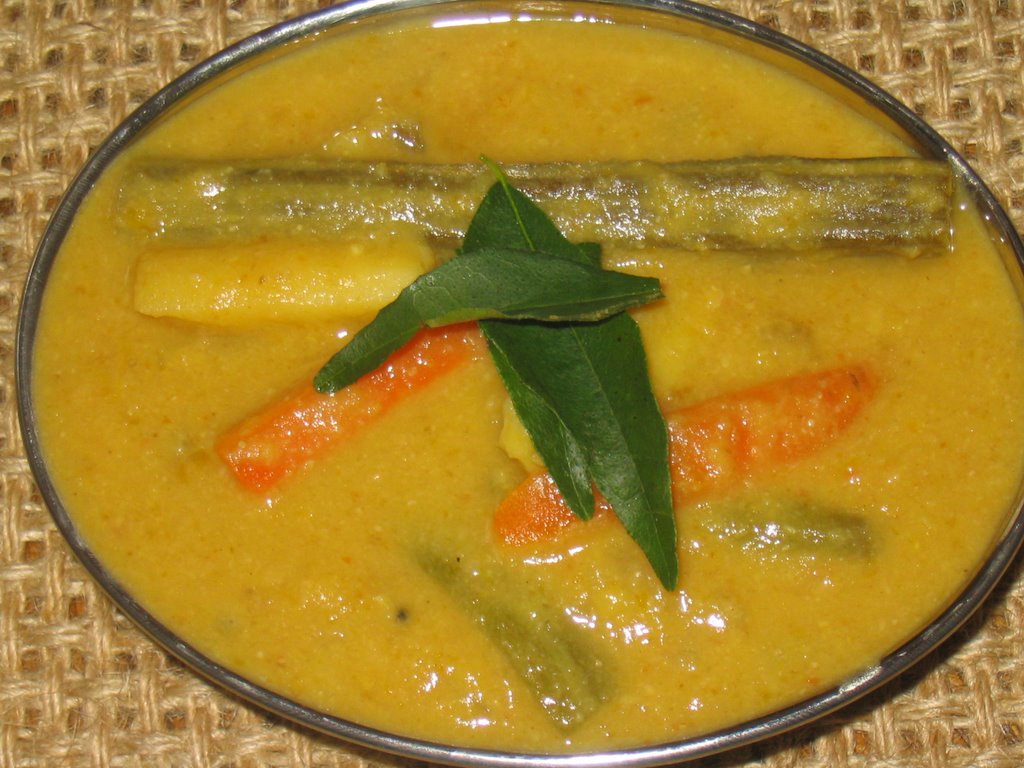
TotheTooth

food and me..

Tuesday, July 04, 2006

Ezhu Kari Kootu

I asked my husband the other day what would he like to have for Sunday lunch and he said ‘Ezhu kari kootu', which means Kootu made of 7 vegetables. Though its called 7 kari kootu, atleast 10 different kinds of veggies go into this typically. I pulled up my good old ‘Meenakshi ammal’s cook book and checked the recipe. This kootu is especially made on ‘Thiruvadarai’ to go with ‘Kali’. Now I’m not a big fan of kali, I’ve made sambar with tons of veggies before but have never called it ‘7 kari kootu’. So I decided to stick to the recipe and tried to find suggested veggies; I got everything but mochai kottai, after some brainstorming decided to substitute Lima beans for ‘Mochai kottai’. I made it like a Sambar, instead of a thick kootu. With chock full of colorful veggies and lentils, this is not only a healthy dish but absolutely delicious. I served it with hot rice, a dash of ghee and fried appalams on the side, now what more can one ask for on a Sunday afternoon ! Later, I headed to the couch straight after lunch and took a nice well-deserved nap!


Recipe adapted from Meenakshi Ammal’s ‘Samaithu Paaru’.
Assorted vegetables – Beans, Green drumsticks, carrots, Green peppers, Raw Bananas, white Pumpkin, Lima beans, yellow squash, zucchini – chopped, 3 cups.
Toor Daal – ½ cup
Tamarind – ¼ cup, soaked in hot water
Water – 2 cups
Coconut – ½ cup
Dried red chilies – 10
Dhaniya seeds – 1/3 cup
Channa Daal – ¼ cup
Oil – 4 tbl spoon
Curry leaves – 10
Mustard seeds – 1 tspn
Asafoetida, a pinch
Salt, per taste

Grind coconut, Red Chilies, Dhaniya seeds and Channa daal to a fine paste with water. Set aside.
Extract tamarind pulp and set aside.
Cook Toor Daal. While this is cooking, heat 2 tables spoon of oil in a big sauce pan, add veggies and fry for 3 minutes.
Now add the tamarind extract and salt and cook till the raw smell of tamarind is gone(about 20 minutes).
Add the ground paste and cooked/mashed daal. Let the whole thing come to a boil and reduce heat and simmer for 5 minutes.
Heat remaining oil in a small pan and add the mustard seeds and Asafoetida. Once the seeds pop, add curry leaves and give it a quick toss. Pour on top of the Sambar. Serve hot with rice.

What with the lentils, lima beans and a mix of veggies, I’m going to send this over to Sweetnicks, as my entry for ARF-5.

Summer is for Vadam

After a week of heavy rains, sunny days are here to stay now! We decided to make the most of the hot weather and made 'Vadam' !! My mom is visiting and has been wanting to make Vadams since the time she saw the deck in the backyard ! Now I'm sure everyone from India has some vadam/papad making memories. When I was growing up, every summer a week to 10 days would be dedicated to making an annual supply of Vadams; they'd be distributed to busy aunts, neighbours who don’t have the time to make their own. And some would also set up a barter system, making different kinds of vadams and exchanging a batch of one for another. It was always fun for the kids, we'd be asked to help around and guard the vadams from smart, clever crows and other birds, that'd swoop down at the right moment and grab a mouthful and fly away! Wonderful memories there..

I wonder if this tradition still continues. My mom tells me that she doesn’t make as much as she used to when we were growing up. I always get my annual supply from my mom or my mother-in-law. Unfortunately, I never learnt to make Vadams . Its on my ‘things to learn & try’ list. I just hope its not one of those dying art forms, where everyone is busy and nobody has the time to make a batch of Vadam from scratch.

Tuesday, May 02, 2006

Bonda, Mysore

Though I started the Tamil food series with great enthusiasm, along the way I slowed down a bit; I’m not able to spend as much time doing this as I thought I could. With a toddler, a full-time job and home & garden requiring constant attention, I never run out of excuses. But I finally got some time to myself this weekend and tried making Mysore Bondas. I’ve no idea why they’re called Mysore Bonda, similarly there is Mysore Rasam which I love and make often. Perhaps these foods were traditionally made by Mysore Iyengars, that's the only explanation I could come up with.

Bondas and Bajjis are an all time favorite snack back where I come from. And of course I’m sure every family has some ‘Sojji-Bajji / Ponnu pakkara’ memories!! In an arranged marriage scenario, the prospective groom’s family would visit the prospective bride’s family. Usually the visits would be scheduled during tea-time,
coffee time actually in Tamilnadu; Sojji(Rava Kesari)and Bajji’s would be served along with Coffee. The girls culinary skills will be measured based on the mom’s cooking skills. Remarks like, ‘Even though the girl wasn’t very attractive, the coffee and Bajji were delicious’, always make rounds ! I personally don’t have any Sojji-Bajji memories, but have heard very interesting and funny stories from my mom and aunts and uncles!

Mysore Bonda

Whole urad Daal – 1 cup, rinsed & soaked in water for 2-3 hours
Water – ¼ cup, for grinding
Green Chili – 5
Whole Black pepper-6
Ginger – 1 inch piece, peeled and chopped finely
Salt – as per taste
Oil – for deep frying
Curry leaves – 6, finely chopped
1/8inch of fresh coconut pieces - 2 table spoon

Drain the water from the daal and grind it with 3 whole green chilies, salt and the half the ginger. Grind till the batter is very soft and fluffy. Add the water sparingly and only to rev up the grinding process. Set the batter aside.
Heat oil in a frying pan.
Finely chop the remaining chilies, add to the batter, along with whole (or partially crushed) black peppers, remaining ginger and curry leaves.
Keep some water in a bowl by the side, wet your fingers in the water and now take a dollop of the batter and drop it in the oil. Repeat till there is no more room in the pan. At least 4/5 bondas can be cooked at a time. The wet fingers help make even balls out of the batter and help the balls glide smoothly into the oil. Once the sizzling sound of the oil stops, reduce heat and slow cook the bondas till
they’re a beautiful golden color through-out. Take them out and drain the excess oil.
Serve immediately with coconut chutney and or Sambar.
Chutney recipe later.

Tuesday, April 18, 2006

Red, yellow and green...Peppers

Thanks to Sweetnicks, I wake up on tuesday mornings thinking of antioxidants! Even on a vacation recently I caught myself thinking of antioxidants when eating out on a tuesday! I ordered a side of Zucchini Parmesan, cooked Lasagna style with vine-ripened tomatoes. They were absolutely delish, I'm on the lookout for a similar recipe. That is one dish I'd love to recreate. Here is my contribution for this tuesday's ARF-5, one of my favorite dishes made with my most favorite vegetable.

Peppers..red, green and yellow

Grilled peppers are my absolute favorite, pulse them with a dash of lime and salt, you've a wonderful dip ready. Add peanuts for extra crunch ! They taste great with sandwiches and are the best antipasti ever. A glass of good wine, grilled peppers, olives and some cheese and a hearty bread, baby in bed, husband by my side - my idea of a perfect friday evening !
This recipe below has an Indian twist, usually made with Paneer (an Indian cheese, very similar in taste and texture to Ricotta Salata) marinated in a yogurt sauce. Typically this recipe calls for lots of spices. I usually omit all spices and just use cayenne pepper and lime juice for seasoning.
I use Tofu instead of Paneer, still tastes great and makes for a very healthy meal when served with whole-wheat bread. I also serve them wrap style, with a yogurt dip in soy Pita (thanks to Trader Joe's)! I probably should write a blog about 'These are a few of my favorite things in TJ's', but that's for another day.

Chopped mixed grilled peppers - 2 cups
(I chopped 1 large red & green pepper, sprayed a little cooking oil and broiled them in the oven for about 15 minutes. Frying them in a wok in high heat also brings out their wonderful flavors.A store bought jar of grilled peppers will work too).
Tomatoes - 2 medium sized, chopped into 1 inch chunks
Medium Red Onion - 1, chopped into 1 inch pieces
Tofu - 1 cup (chopped into 1 inch cubes)
Yogurt - 1/2 cup (for marinade)
Cayenne Pepper - 2 tspn
Salt - per taste
Turmeric - 1/4tspn
Oil - 1 tablespoon
Lime juice - 1 tspn

Whisk yogurt, turmeric, salt and a teaspoon of cayenne pepper together.
Marinate the tofu cubes in this mixture for atleast 30 minutes.
Line a baking sheet with aluminium foil and arrange the tofu pieces.
Spray
cooking oil and broil for 5-8 minutes.

Heat oil and add onion. Saute them till they turn slightly brown, about
5 minutes. Add 1 tspn of cayenne pepper. Add the peppers and saute for 2-3 minutes.
Reduce heat to simmer and add the tomatoes and salt. Cover and cook for 3 minutes.
Add the tofu pieces and stir gently. Turn off heat. Squeeze lime juice.
Serve warm with bread. An everyday white wine will be a good accompaniment.
Wonder if there are any antioxidants in red wine ? That will make for a very easy ARF-5 contribution !

Monday, April 10, 2006

Food blogger's meme

Back to blogging after a long hiatus and what better way to be welcomed than being invited to do a 'Meme'..Thanks Ashwini, I feel like I belong.

1. Please list 3 recipes you've recenty bookmarked from foodblogs to
try:

Its birthday week in the family and I've been scouring the internet for toddler-
friendly recipes and saw this. Not exactly toddler-friendly,
but looks extremely friendly to me !! Going to try this very soon -
Esurientes' Caramel Hazelnut Chocoate slice

Domestic Goddess's Vegetarian chili

and Ashwini's Granola. Actually I've made this granola 3 times now and need to make some more for this week. I picked up a big box of old fashioned oats from Costco without realizing they were old-fashioned. And the next day I saw Ashwini's granola recipe and have been making small batches every week. It tastes awesome with cold milk and saves so much time, no more soaking and nuking oats in the morning.

2. Foodblog in your vicinity

My little Kitchen

3. A Foodblog located far from you

Chocolate and Zuchini
Esurientes
Gluttony is no sin
Chai Paani

4. A foodblog (or more) you've discovered recenty, where did you find it ?
I'm myself a rookie in the blogging world, I'm discovering new food
blogs every day. The most recent one - Gluttony is no sin.

5. Any people or bloggers you want to tag with this meme ?

Gluttony is no sin
Chai Paani
My litte Kitchen

Friday, March 17, 2006

Adai Continued...


Tuesday, Mar 14 was 'Kaaradaiyaar Nonbu', a nonbu is basically a
day/time allotted to observe certain norms and rituals for a specific purpose.
Kaaradiyaar nonbu is celebrated to honour Savithri and her love for her
husband Sathyavan, who she literally rescued from Death's hands, so the
myth goes. Apparently Savithri outwitted the God of Death and rescued
her husband. I wonder if people from other parts of India celebrate this. I
think this is more of a Southern Indian Brahmin Nonbu, could be wrong
though. But personally, this is one of my favorite festivals. I love it
not only because the food prepared for this Nonbu-Adai is so simple and
delicious and healthy (if you over look the butter part !), but also
because the idea of taking time to slow down and thank God for the
wonderful man in your life is so romantic and really sweet.

Now about the most important thing about this Nonbu - the food ! 2 types of
adais (also called Kozhukattais in some families) are made- sweet &
savory. These are made out of Rice flour, Jaggery (a type of unrefined brown
sugar)is used for sweet adais . The special thing about these adais is the
use of Black eyed lentils in both the sweet & savory version.

Uppu adai (Savory adai)

1 cup Rice flour (I use store bought Rice flour, my mom soaks rice in
water briefly, lays it out on a big plate to dry then grinds it and uses it)
1/4 cup cooked black eyed lentils (see note about cooking black eyed
lentils)
2 Tbl spoon grated coconut
3 small Green chillis, slit
1 tspn Mustard seeds
1 tspn Urad seeds
1 Tbl spoon oil
A pinch of Asafoetida (Hing)
10 curry leaves, chopped roughly
2 cups water

Heat a pan and dry roast the rice flour in a pan, for about 5 minutes.
Keep stirring and be careful not to burn it. Transfer to a plate.
Now add oil to the pan. Add mustard seeds, wait till they stop popping.
Add Urad seeds, hing, curry leaves, chillies and coconut.
Add 2 cups water and bring to a boil.
Slowly add the rice flour, while continuing to stir the mixture with
another hand. A good quick hand movement is required here to avoid
lumps.
A good soft dough should be formed, turn off the heat and let it cool.

Meanwhile, prepare the dough for sweet adais.

Sweet adai

1 cup Rice flour
1/2 cup Jaggery
1/2 cup water
2 Tbl spoon grated coconut
1 tspn Cardamom powder
1/4 cup cooked black eyed beans
1 Tbl spoon ghee

Heat a pan and dry roast the rice flour for about 5 minutes. Transfer
to a plate.
To the same pan, add Jaggery and water and stir till the jaggery
dissolves in water.
Add cardamom powder, coconut and black eyed beans.
When the mixture starts boiling, slowly add rice flour and continue to
stir the mixture.
Add the ghee and stir so that ghee gets coated evenly on the dough and
a nice soft pliable dough is formed.
Turn off the heat and let the dough cool for a while.

Apply some oil to the palms, it helps making soft adais that dont stick
to one's hands (and ofcourse moisturizes the hands too!).
Make small round patties, about 2 inches in size.
Now these adais need to be steamed. Most Indian families own a
pressure-cooker and its really easy to steam these like Idlis in a
cooker.
The Idli plates can be used for steaming or any other plate that fits
in the cooker can be used for steaming.
Grease the plate and transfer adais to this plate. Do not over lap,
steam in batches if required. Steam the adais for about 10 minutes.
Serve warm with dollops of butter on them.

Note about Black eyed beans - Dry roast raw beans in a pan on medium
heat for about 5 miutes. Add enough water to cover the beans and cook for
about 15 minutes. The beans should not be over cooked, but just done.

Tuesday, March 14, 2006

ButterNut Squash

A few weeks ago I was at a party where someone had brought oven-roasted
butternut squash. They were absolutely delish. Except for the Zuchini
or an occasional yellow squash, I usually dont linger around in the squash
aisle, but when I saw a packet of chopped butternut squash at Trader Joe's
yesterday I knew I had to try them.
I tossed the squash in some butter and sprinkled Brown sugar and salt
and stuck it in the oven for about 40 minutes, 350'F. They were gorgeous
and really yummy and so easy to put together !! I read some about butternut squash, they have an abundance of Vitamin A and are an excellent source of Antioxidants. So here is my first entry for ARF-5/Tuesday !


Chopped squash - 1.5 cups (cut into 1 inch cubes)
2 Tbl spoon butter, melted
4 Tbl spoon Brown sugar
Salt & pepper to taste.
Toss chopped squash with butter and sugar. Sprinkle salt & peper, lay them out evenly in a cookie sheet.Cook for 30-45 (depending on how soft you want them) minutes,in a 350'F preheated oven. Serve warm. Great as a side dish or as a snack.

Friday, March 10, 2006

A is for Adai & Aviyal

Inspired by Nupur's A-Z of Marathi food, I'm thinking of doing an A-Z of Tamil food. I love the traditional South Indian foods; some are so elaborate and some so simple, but they're mostly vegetarian and really nutritious and healthy. I try to keep the preparation as authentic and straight-forward as possible. There are so many other wonderful foods in Tamilnadu that go way beyond the typical fare found in restaurant menus. I've tried making many of these, some have come out amazingly well and some not so well..I've failed miserably many times to create the exact flavor of my Grandmother's Vathalkuzhambu but always end up making pretty decent 'pavakai pitlai'.
This is going to be aother humble attempt in trying to cook up Tamil food, everyday food, special occasion food, except this time I'm going to document it and learn from other bloggers as well.
I'm a Tamil Iyer and am most familiar with the foods prepared in a Iyer home. I'd love to learn about the differences between Iyer & Iyengar cooking. I've a soft corner for anything 'Chettinadu'. On my A-Z journey, I'm going to try to include some Chettinadu recipes also.

A is for Adai & Aviyal

Adai is this wonderful dosa like crepe. I'm calling it a crepe, because
its round and cooked like a crepe. Its not thin like a crepe. I hate to
refer it as Lentil pancake, its nothing like a pancake. An adai when served
with avial makes a wholesome, nutrituous meal.Aviyal is a medley of boiled vegetables (think carrots, beans, cauliflower, potatoes, peas, squash etc) simmered in yogurt, coconut gravy. And its so easy to make the batter for adai, no need to toil over
fermenting the batter in the cold winter months.
Heck, even the amount of lentils dont have to be measured correctly, the more the lentils, the merrier the Adai is !!
I do follow my mom's measure though:
2 cups Idli rawa ( Par-boiled rice for those who want to make it the
elaborate way)
3/4 cups Tuvar Daal
1/4 cup Channa Daal
1 teaspoon methi seeds
2 teaspoons Urid Daal
5-6 dried red chillies
10 curry leaves
1 inch of peeled ginger, chopped into small pieces.
Pich of Hing
Salt to taste

Soak the Daals for about 2 hours and Idli rawa for about 1 hour. Blend
everything together. Make sure not to over blend, just give it a good
whirr a couple of times and that's it. The batter should be coarse to touch
and the Daals shouldnt become mushy. That's what makes the adais real
crisp. Once the batter is ready, you can make adais immediately or the next
day. The batter stores very well in the fridge for upto 2 weeks.

Now to make adais for 2 people:
Mix 1 cup batter with 1/4 cup finely chopped onion.
Other optional extras: 1 teaspoon Finely chopped ginger (ginger is supposed to
thwart the gassy effects of Lentils. I've my doubts though !!), 1 green chilli.
And a good heavy iron griddle - this is the most important, in my
opinion.
An iron griddle works better than a non-stick pan. Maintaining the heat
to cook adai evenly is what makes the difference.


Heat the griddle. To test the heat, sprinkle water, it should sizzle.
Take a ladle ful of batter, pour it in the griddle and spread it
evenly. This should not be very thin or very thick. Poke holes with a spoon
throughout the adai. Pour oil around the adai and into the holes. And let it cook
for upto 3-5 minutes. Flip it around and cook evenly on the other side. The
result should be a golden brown adai, crisp on the outside and soft on
the inside. Serve with a pat of butter and Avial on the side. Can also be served
with Sambar & chutney.

Adais can also be made with Fresh methi leaves, coconut, spinach. But
nothing comes close to Adais made with onion.

I made a simple Kootu (vegetables & Moong Daal) to go with adai today.


I'll post the recipe for aviyal later.